 Austria - EUR
 Belgium - EUR
 Bulgaria - EUR
 Cyprus - EUR
 Czech Republic - EUR
 Estonia - EUR
 Greece - EUR
 Hungary - EUR
 UK - GBP
 Ireland - EUR
 Latvia - EUR
 Lithuania - EUR
 Luxembourg - EUR
 Malta - EUR
 Netherlands - EUR
 Norway - NOK
 Portugal - EUR
 Romania - EUR
 Slovakia - EUR
 Slovenia - EUR
 Switzerland - EUR
Change the blade disc on Husqvarna Automower 310, 315 and 315X
Here is a step by step guide of how to disassemble and replace the blade disc on the Husqvarna Automower 310, 315 and 315X. The same principle applies to a wide range of other Automower models.
A cracked or damaged blade disc causes an imbalance in the cutting system resulting in missing blades or noise from the robotic lawnmower.
Changing the blade disc is a simple process and doesn't require any special tools. See below for step by step instructions.
At the bottom of the page there is a list of the spare parts needed for the job.
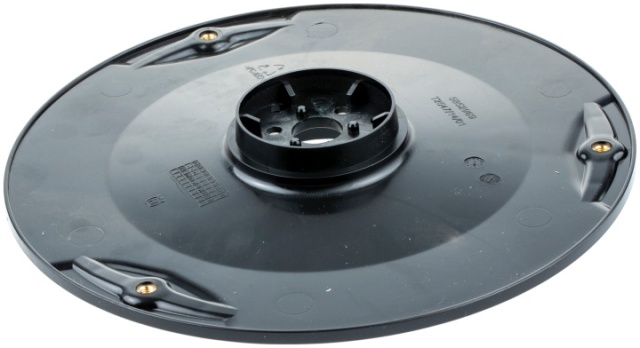
.jpg) Step 1: Turn your Automower over. Find the three screws that hold the cover and skid plate in place. Unscrew them. Step 1: Turn your Automower over. Find the three screws that hold the cover and skid plate in place. Unscrew them. | .jpg) Step 2: Lift off the skid plate and the cover. Unscrew the centre screw that secures the bearing holder. Use a size 4 allen key and hold the blade while loosening the screw. This screw can be tight and you may have to use a lot of force. This screw usually has a left-hand thread. Step 2: Lift off the skid plate and the cover. Unscrew the centre screw that secures the bearing holder. Use a size 4 allen key and hold the blade while loosening the screw. This screw can be tight and you may have to use a lot of force. This screw usually has a left-hand thread. |
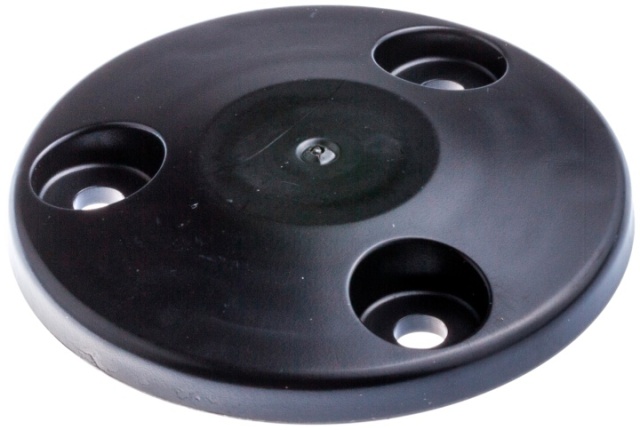
.jpg) Step 3: When you've removed the centre screw, you can lift up the bearing holder. Then unscrew the three torx screws that hold the blade disc in place. | .jpg) Step 4: Lift off the blade disc. |
.jpg) Step 5: Insert the new blade disc (assemble the new blades on it first). Reinstall the bearing holder, making sure its spikes are pointing up. See image. Screw back the central screw. | .jpg) Step 6: Put the skid plate in its place. |
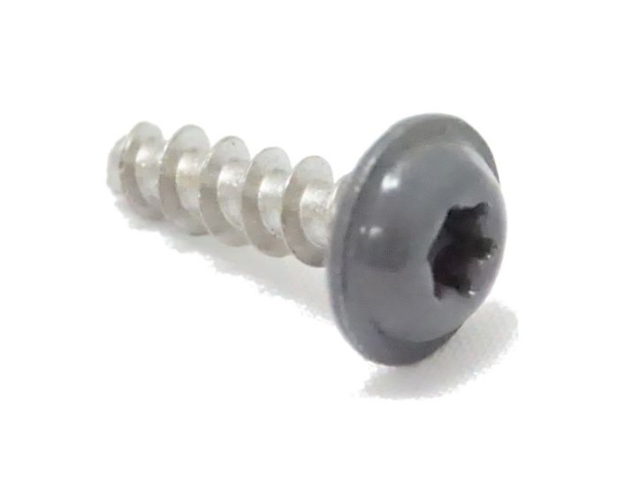
.jpg) Step 7: Put the plastic cover back on and screw in the four screws that secure the cover and skid plate. Make sure all the parts can rotate freely after you have finished. |
Then just use your Automower as usual.
Change the blade disc on Husqvarna Automower 310, 315 and 315X
Here is a step by step guide of how to disassemble and replace the blade disc on the Husqvarna Automower 310, 315 and 315X. The same principle applies to a wide range of other Automower models.
A cracked or damaged blade disc causes an imbalance in the cutting system resulting in missing blades or noise from the robotic lawnmower.
Changing the blade disc is a simple process and doesn't require any special tools. See below for step by step instructions.
At the bottom of the page there is a list of the spare parts needed for the job.
| Step 1: Turn your Automower over. Find the three screws that hold the cover and skid plate in place. Unscrew them. |
| Step 2: Lift off the skid plate and the cover. Unscrew the centre screw that secures the bearing holder. Use a size 4 allen key and hold the blade while loosening the screw. This screw can be tight and you may have to use a lot of force. This screw usually has a left-hand thread. |
Step 3: When you've removed the centre screw, you can lift up the bearing holder. Then unscrew the three torx screws that hold the blade disc in place. |
Step 4: Lift off the blade disc. |
Step 5: Insert the new blade disc (assemble the new blades on it first). Reinstall the bearing holder, making sure its spikes are pointing up. See image. Screw back the central screw. |
Step 6: Put the skid plate in its place. |
Step 7: Put the plastic cover back on and screw in the four screws that secure the cover and skid plate. Make sure all the parts can rotate freely after you have finished. |
Then just use your Automower as usual.
Spare parts used
 Help center is a digital DIY manual for Husqvarna Automower robotic lawnmower. We teach you how to change batteries, circuitboards and other spare parts on your Husqvarna Automower.