 Austria - EUR
 Belgium - EUR
 Bulgaria - EUR
 Cyprus - EUR
 Czech Republic - EUR
 Estonia - EUR
 Greece - EUR
 Hungary - EUR
 UK - GBP
 Ireland - EUR
 Latvia - EUR
 Lithuania - EUR
 Luxembourg - EUR
 Malta - EUR
 Netherlands - EUR
 Norway - NOK
 Portugal - EUR
 Romania - EUR
 Slovakia - EUR
 Slovenia - EUR
 Switzerland - EUR
How to change the loop sensor on the Husqvarna Automower 420
Here is a step by step guide of how to disassemble and replace the loop sensor on the Husqvarna Automower G3 (320, 330X, 420, 430X, 440, 450X)
If the loop sensor is faulty you may see the error message "No loop signal". Always check the loop and the charging station first before determining if the loop sensor is defective.
At the bottom of the page there is a list of the spare parts needed to do the job.
Tools used: Torx screwdriver T20.
-(1).jpg) Step 1: Turn your Automower over and disconnect the power cable. First remove the rubber cap; then disassemble the charging connector. Step 1: Turn your Automower over and disconnect the power cable. First remove the rubber cap; then disassemble the charging connector. | .jpg) Step 2: Detach the chassis. You do this by holding the lawnmower as shown in the picture and using your right hand to pull the chassis upwards. It's attached by two points on the back and two on the front. Step 2: Detach the chassis. You do this by holding the lawnmower as shown in the picture and using your right hand to pull the chassis upwards. It's attached by two points on the back and two on the front. |
-(1).jpg) Step 3: Unscrew all the screws around the chassis. 14 in total. | .jpg) Step 4: Lift up the top of the chassis. Disconnect the long flat white connector that goes to the motherboard according to the yellow marking. Put the bottom part of the chassis to the side. |
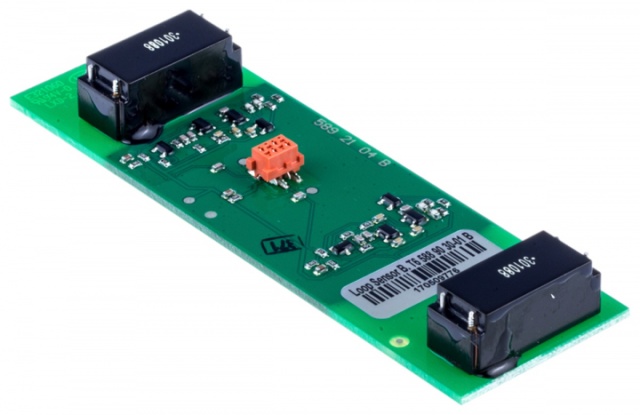
.jpg) Step 5: The loop sensor is at the front of the robot. Unscrew the two screws holding the loop sensor according to the markings and disconnect the power. | .jpg) Step 6: Remove the old loop sensor. |
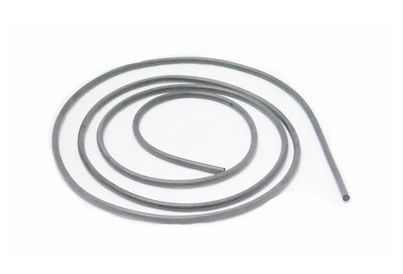
Step 7: Install the new loop sensor and screw the holders according to the markings. | Step 8: Get out the lower part of the chassis and connect the flat lead from the upper part to the motherboard accoding to the markings. Change the sealing strip in the under chassis at the same time. |
Step 9: Screw back all the 14 screws around the chassis. | Step 10: Put the chassis on the robot by placing it on all four points simultaneously. Finally, connect the charging cable and press the rubber plug back into the lower part of the chassis. |
After you've changed the loop sensor you can use your lawnmower as usual.
How to change the loop sensor on the Husqvarna Automower 420
Here is a step by step guide of how to disassemble and replace the loop sensor on the Husqvarna Automower G3 (320, 330X, 420, 430X, 440, 450X)
If the loop sensor is faulty you may see the error message "No loop signal". Always check the loop and the charging station first before determining if the loop sensor is defective.
At the bottom of the page there is a list of the spare parts needed to do the job.
Tools used: Torx screwdriver T20.
| Step 1: Turn your Automower over and disconnect the power cable. First remove the rubber cap; then disassemble the charging connector. |
| Step 2: Detach the chassis. You do this by holding the lawnmower as shown in the picture and using your right hand to pull the chassis upwards. It's attached by two points on the back and two on the front. |
Step 3: Unscrew all the screws around the chassis. 14 in total. |
Step 4: Lift up the top of the chassis. Disconnect the long flat white connector that goes to the motherboard according to the yellow marking. Put the bottom part of the chassis to the side. |
Step 5: The loop sensor is at the front of the robot. Unscrew the two screws holding the loop sensor according to the markings and disconnect the power. |
Step 6: Remove the old loop sensor. |
Step 7: Install the new loop sensor and screw the holders according to the markings. |
Step 8: Get out the lower part of the chassis and connect the flat lead from the upper part to the motherboard accoding to the markings. Change the sealing strip in the under chassis at the same time. |
Step 9: Screw back all the 14 screws around the chassis. |
| Step 10: Put the chassis on the robot by placing it on all four points simultaneously. Finally, connect the charging cable and press the rubber plug back into the lower part of the chassis. |
After you've changed the loop sensor you can use your lawnmower as usual.
Spare parts used
 Help center is a digital DIY manual for Husqvarna Automower robotic lawnmower. We teach you how to change batteries, circuitboards and other spare parts on your Husqvarna Automower.