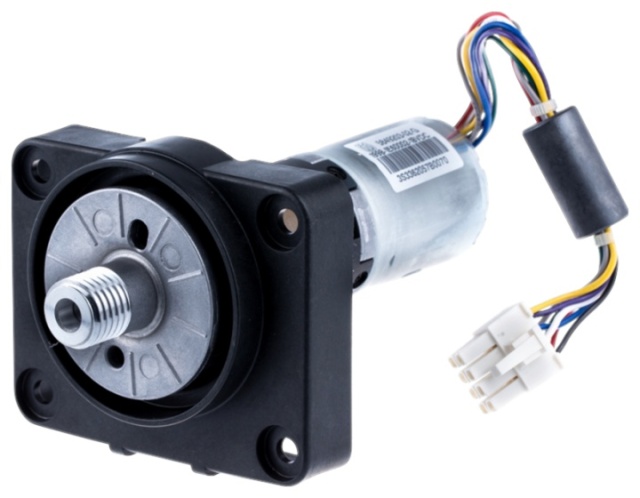
Change the wheel motor on the HusqvarnaAutomower 310,315 and 315X
Here is a step by step guide of how to disassemble and replace the wheel motor on the Husqvarna Automower. A faulty wheel motor can often generate the error code "Wheel motor blocked" or you notice that the robot goes in circles because only one motor is operational. Before starting to change the drive motor, you should ensure that it's actually the motor that is at fault, as a damaged motherboard could be the cause of the problem.
For example, if you see the error code "Right wheel motor blocked", you can try moving the right drive motor to the left side (or vice versa). If the error persists on the right side, it is most likely the motherboard. Replacing the drive motor will not remedy the fault.
Changing the wheel motor is a simple process. See below for step by step instructions.
At the bottom of the page there is a list of the spare parts needed to do the job.
.jpg) Step 1: Turn your Automower over and disconnect the power cable. First remove the rubber cap; then disassemble the charging connector. Step 1: Turn your Automower over and disconnect the power cable. First remove the rubber cap; then disassemble the charging connector. | .jpg) Step 2: Remove the chassis from the robot. You do this by holding the back end of the chassis and pulling it firmly upwards. The chassis will be released from the two rear mounts, then you can fold the chassis forward to release it from the two front mounts. Step 2: Remove the chassis from the robot. You do this by holding the back end of the chassis and pulling it firmly upwards. The chassis will be released from the two rear mounts, then you can fold the chassis forward to release it from the two front mounts. |
.jpg) Step 3: Unscrew the 14 screws that secure the top of the chassis. Also remove the cutting height adjustment knob by pulling it up. | .jpg) Step 4: Lift off the top of the chassis and disconnect the main cable (flat cable) from the motherboard. It's marked with a yellow ring. Put the top part of the chassis aside. |
.jpg) Step 5: Remove the sealing strip for the chassis halves and the sealing strip for the blade motor. | .jpg) Step 6: Disconnect the drive motor. Marked with a yellow ring. |
.jpg) Step 7: Stand the robot up vertically and remove the drive wheel hub cap, nut and washer. Finally, remove the running wheel from the axle. Unscrew the four screws that keep the drive motor in place. | .jpg) Step 8: Lift up the drive motor. Make sure the lead doesn't get stuck in the other leads inside the robot. |
.jpg) Step 9: Assemble the new drive motor in its position. Screw it in and then connect it to the motherboard. | .jpg) Step 10: Reassemble the parts in reverse order, and you're done! Don't forget to add new sealing strips for both the chassis and the blade motor. Don't forget to reinsert the charging cable and rubber plug. |
You don't need to programme anything after resolving the drive motor. Just use your Automower as usual.
Change the wheel motor on the HusqvarnaAutomower 310,315 and 315X
Here is a step by step guide of how to disassemble and replace the wheel motor on the Husqvarna Automower. A faulty wheel motor can often generate the error code "Wheel motor blocked" or you notice that the robot goes in circles because only one motor is operational. Before starting to change the drive motor, you should ensure that it's actually the motor that is at fault, as a damaged motherboard could be the cause of the problem.
For example, if you see the error code "Right wheel motor blocked", you can try moving the right drive motor to the left side (or vice versa). If the error persists on the right side, it is most likely the motherboard. Replacing the drive motor will not remedy the fault.
Changing the wheel motor is a simple process. See below for step by step instructions.
At the bottom of the page there is a list of the spare parts needed to do the job.
.jpg) Step 1: Turn your Automower over and disconnect the power cable. First remove the rubber cap; then disassemble the charging connector. Step 1: Turn your Automower over and disconnect the power cable. First remove the rubber cap; then disassemble the charging connector. |
.jpg) Step 2: Remove the chassis from the robot. You do this by holding the back end of the chassis and pulling it firmly upwards. The chassis will be released from the two rear mounts, then you can fold the chassis forward to release it from the two front mounts. Step 2: Remove the chassis from the robot. You do this by holding the back end of the chassis and pulling it firmly upwards. The chassis will be released from the two rear mounts, then you can fold the chassis forward to release it from the two front mounts. |
.jpg) Step 3: Remove the chassis from the robot. You do this by holding the back end of the chassis and pulling it firmly upwards. The chassis will be released from the two rear mounts, then you can fold the chassis forward to release it from the two front mounts. |
.jpg) Step 4: Lift off the top of the chassis and disconnect the main cable (flat cable) from the motherboard. It's marked with a yellow ring. Put the top part of the chassis aside. |
.jpg) Step 5: Remove the sealing strip for the chassis halves and the sealing strip for the blade motor. |
.jpg) Step 6: Disconnect the drive motor. Marked with a yellow ring. |
.jpg) Step 7: Stand the robot up vertically and remove the drive wheel hub cap, nut and washer. Finally, remove the running wheel from the axle. Unscrew the four screws that keep the drive motor in place. |
.jpg) Step 8: Lift up the drive motor. Make sure the lead doesn't get stuck in the other leads inside the robot. |
.jpg) Step 9: Assemble the new drive motor in its position. Screw it in and then connect it to the motherboard. |
.jpg) Step 10: Reassemble the parts in reverse order, and you're done! Don't forget to add new sealing strips for both the chassis and the blade motor. Don't forget to reinsert the charging cable and rubber plug. |
You don't need to programme anything after resolving the drive motor. Just use your Automower as usual.


 Help center is a digital DIY manual for Husqvarna Automower robotic lawnmower. We teach you how to change batteries, circuitboards and other spare parts on your Husqvarna Automower.