 Austria - EUR
 Belgium - EUR
 Bulgaria - EUR
 Cyprus - EUR
 Czech Republic - EUR
 Estonia - EUR
 Greece - EUR
 Hungary - EUR
 UK - GBP
 Ireland - EUR
 Latvia - EUR
 Lithuania - EUR
 Luxembourg - EUR
 Malta - EUR
 Netherlands - EUR
 Norway - NOK
 Portugal - EUR
 Romania - EUR
 Slovakia - EUR
 Slovenia - EUR
 Switzerland - EUR
Change the blade disc on Automower 220AC and 230ACX
Here is a step by step guide of how to disassemble and replace the blade disc on the Husqvarna Automower 220AC and 230ACX. The same principle applies for both 260ACX and 265ACX.
A cracked or damaged blade disc causes an imbalance in the cutting system that can result in missing blades or noise from the robotic lawnmower.
Changing the blade disc is a simple process and doesn't require any special tools. See below for step by step instructions.
At the bottom of the page there is a list of the spare parts needed for the job.
Tools we use: Torx screwdriver T20, Allen key size 4.
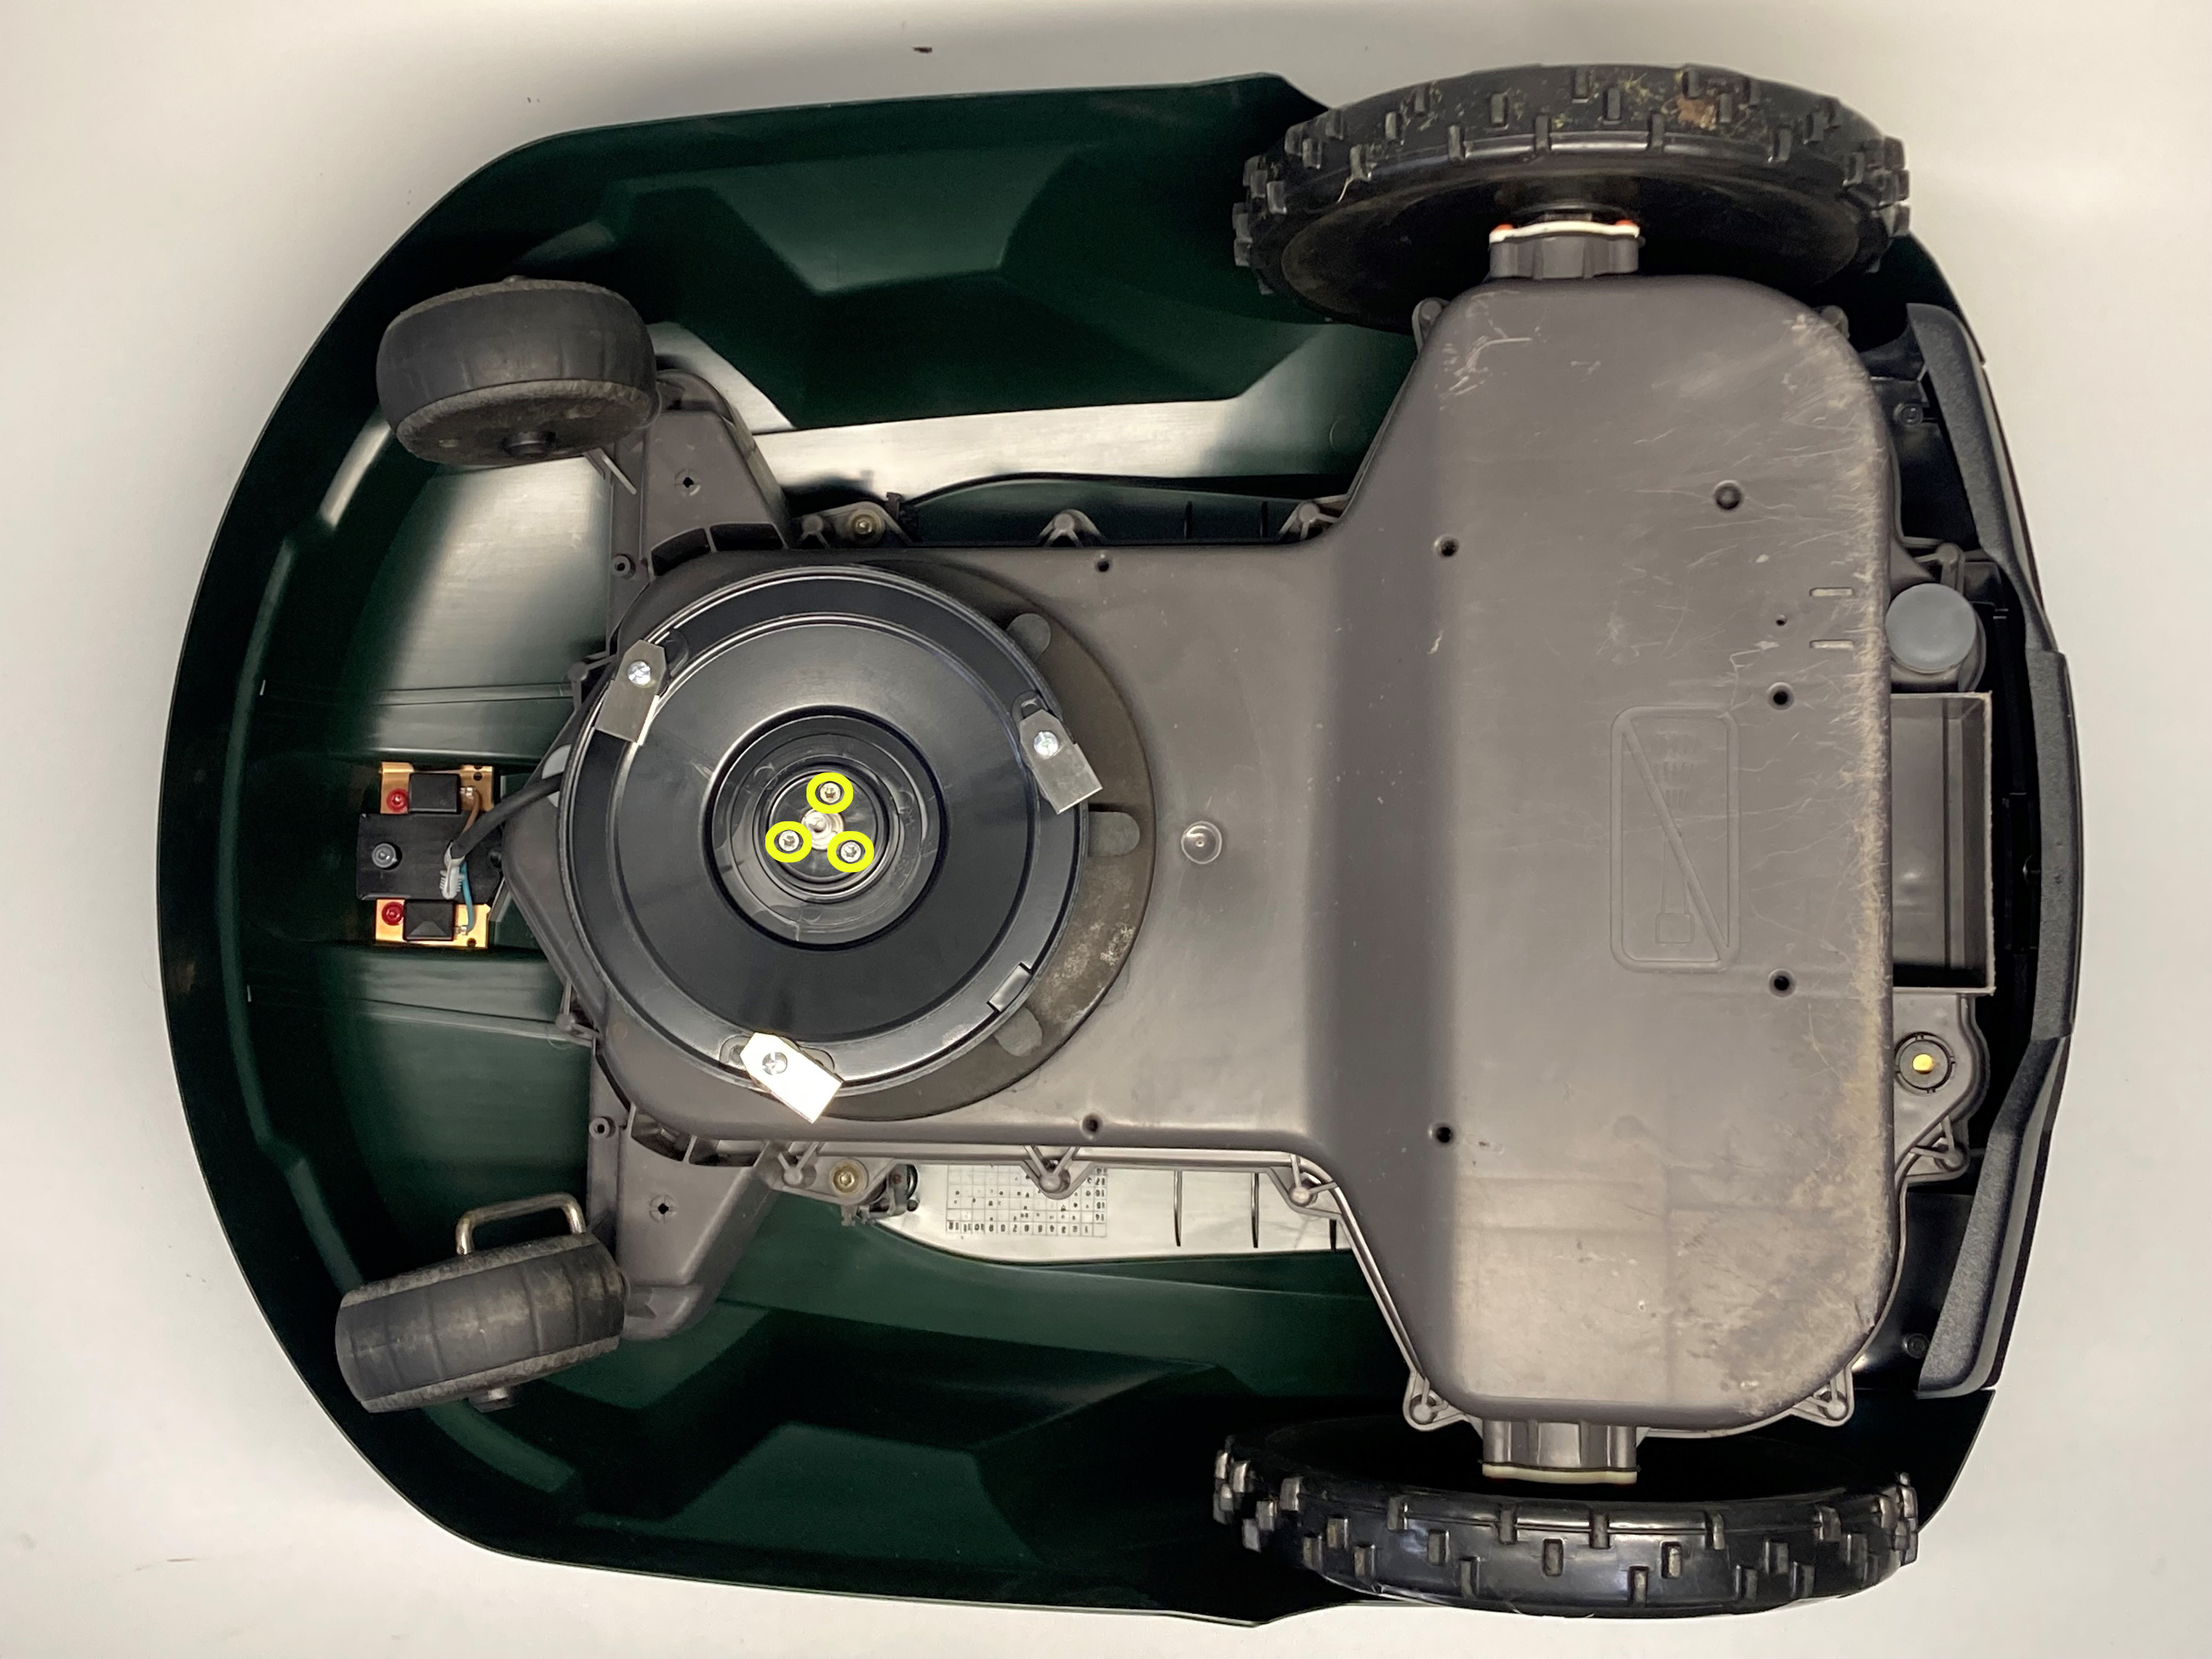
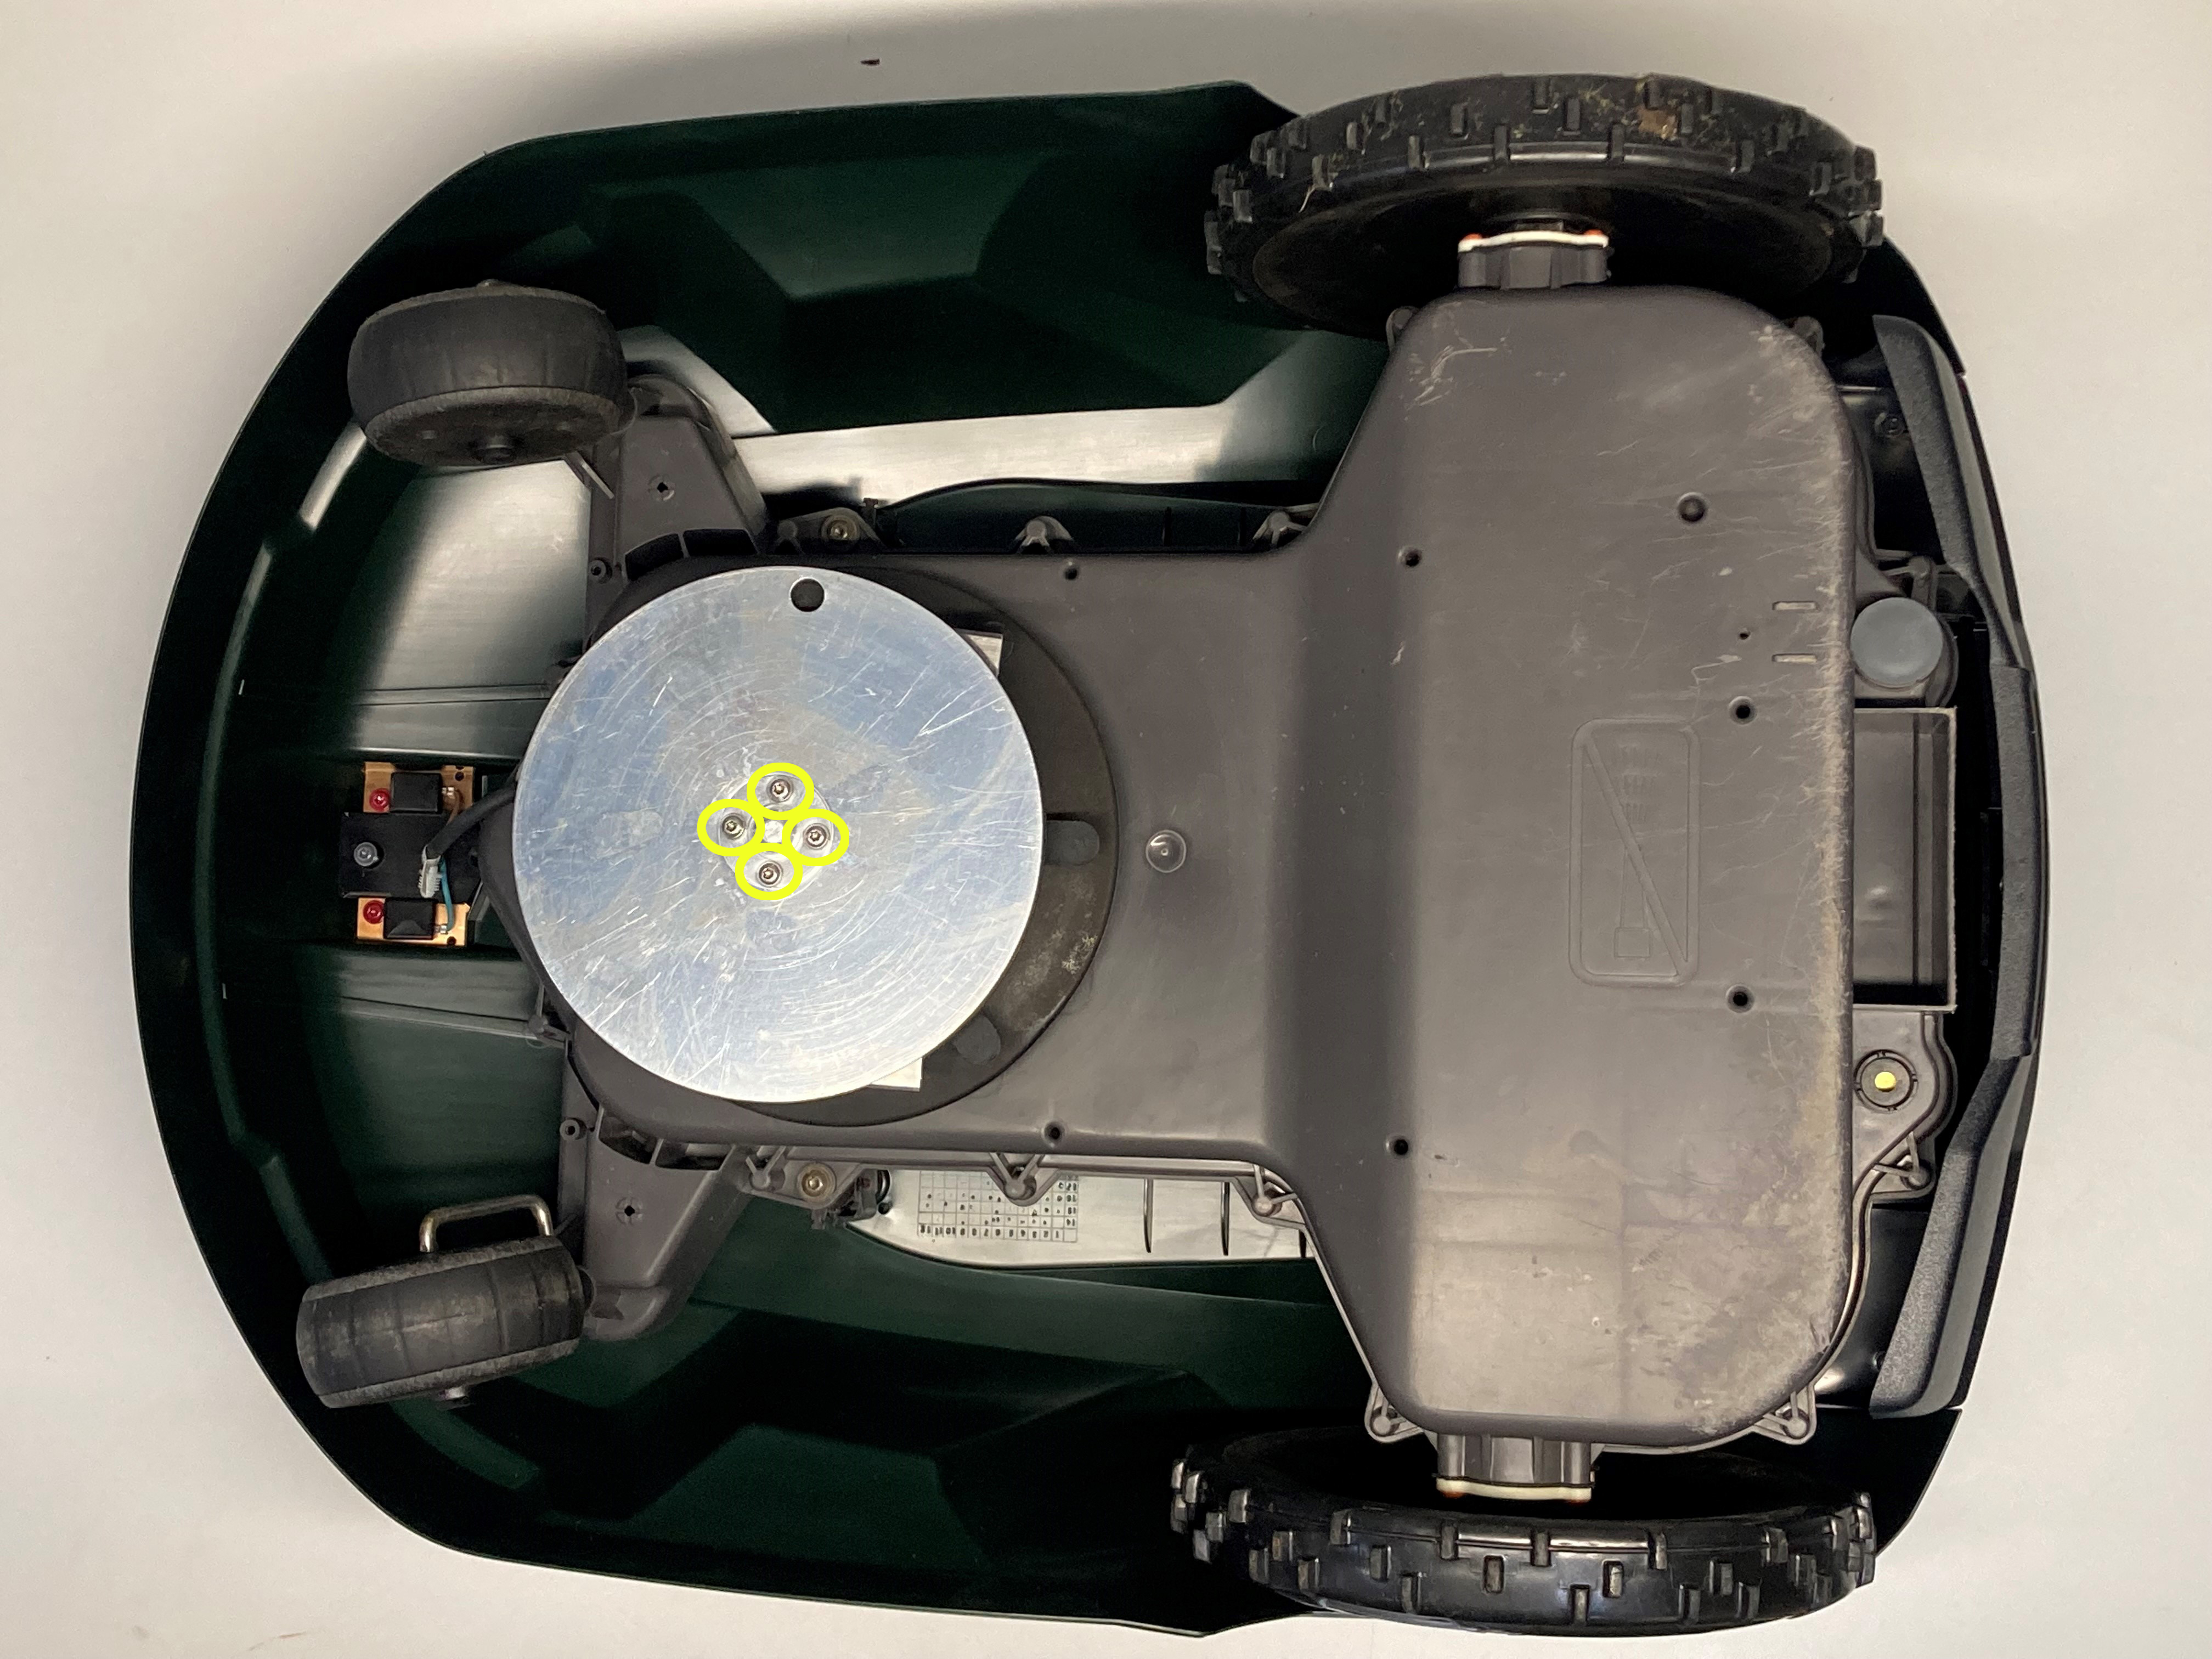 Step 1: Turn your Automower over. Unscrew the four marked screws that keep the engine protector pkate in place. Step 1: Turn your Automower over. Unscrew the four marked screws that keep the engine protector pkate in place. | 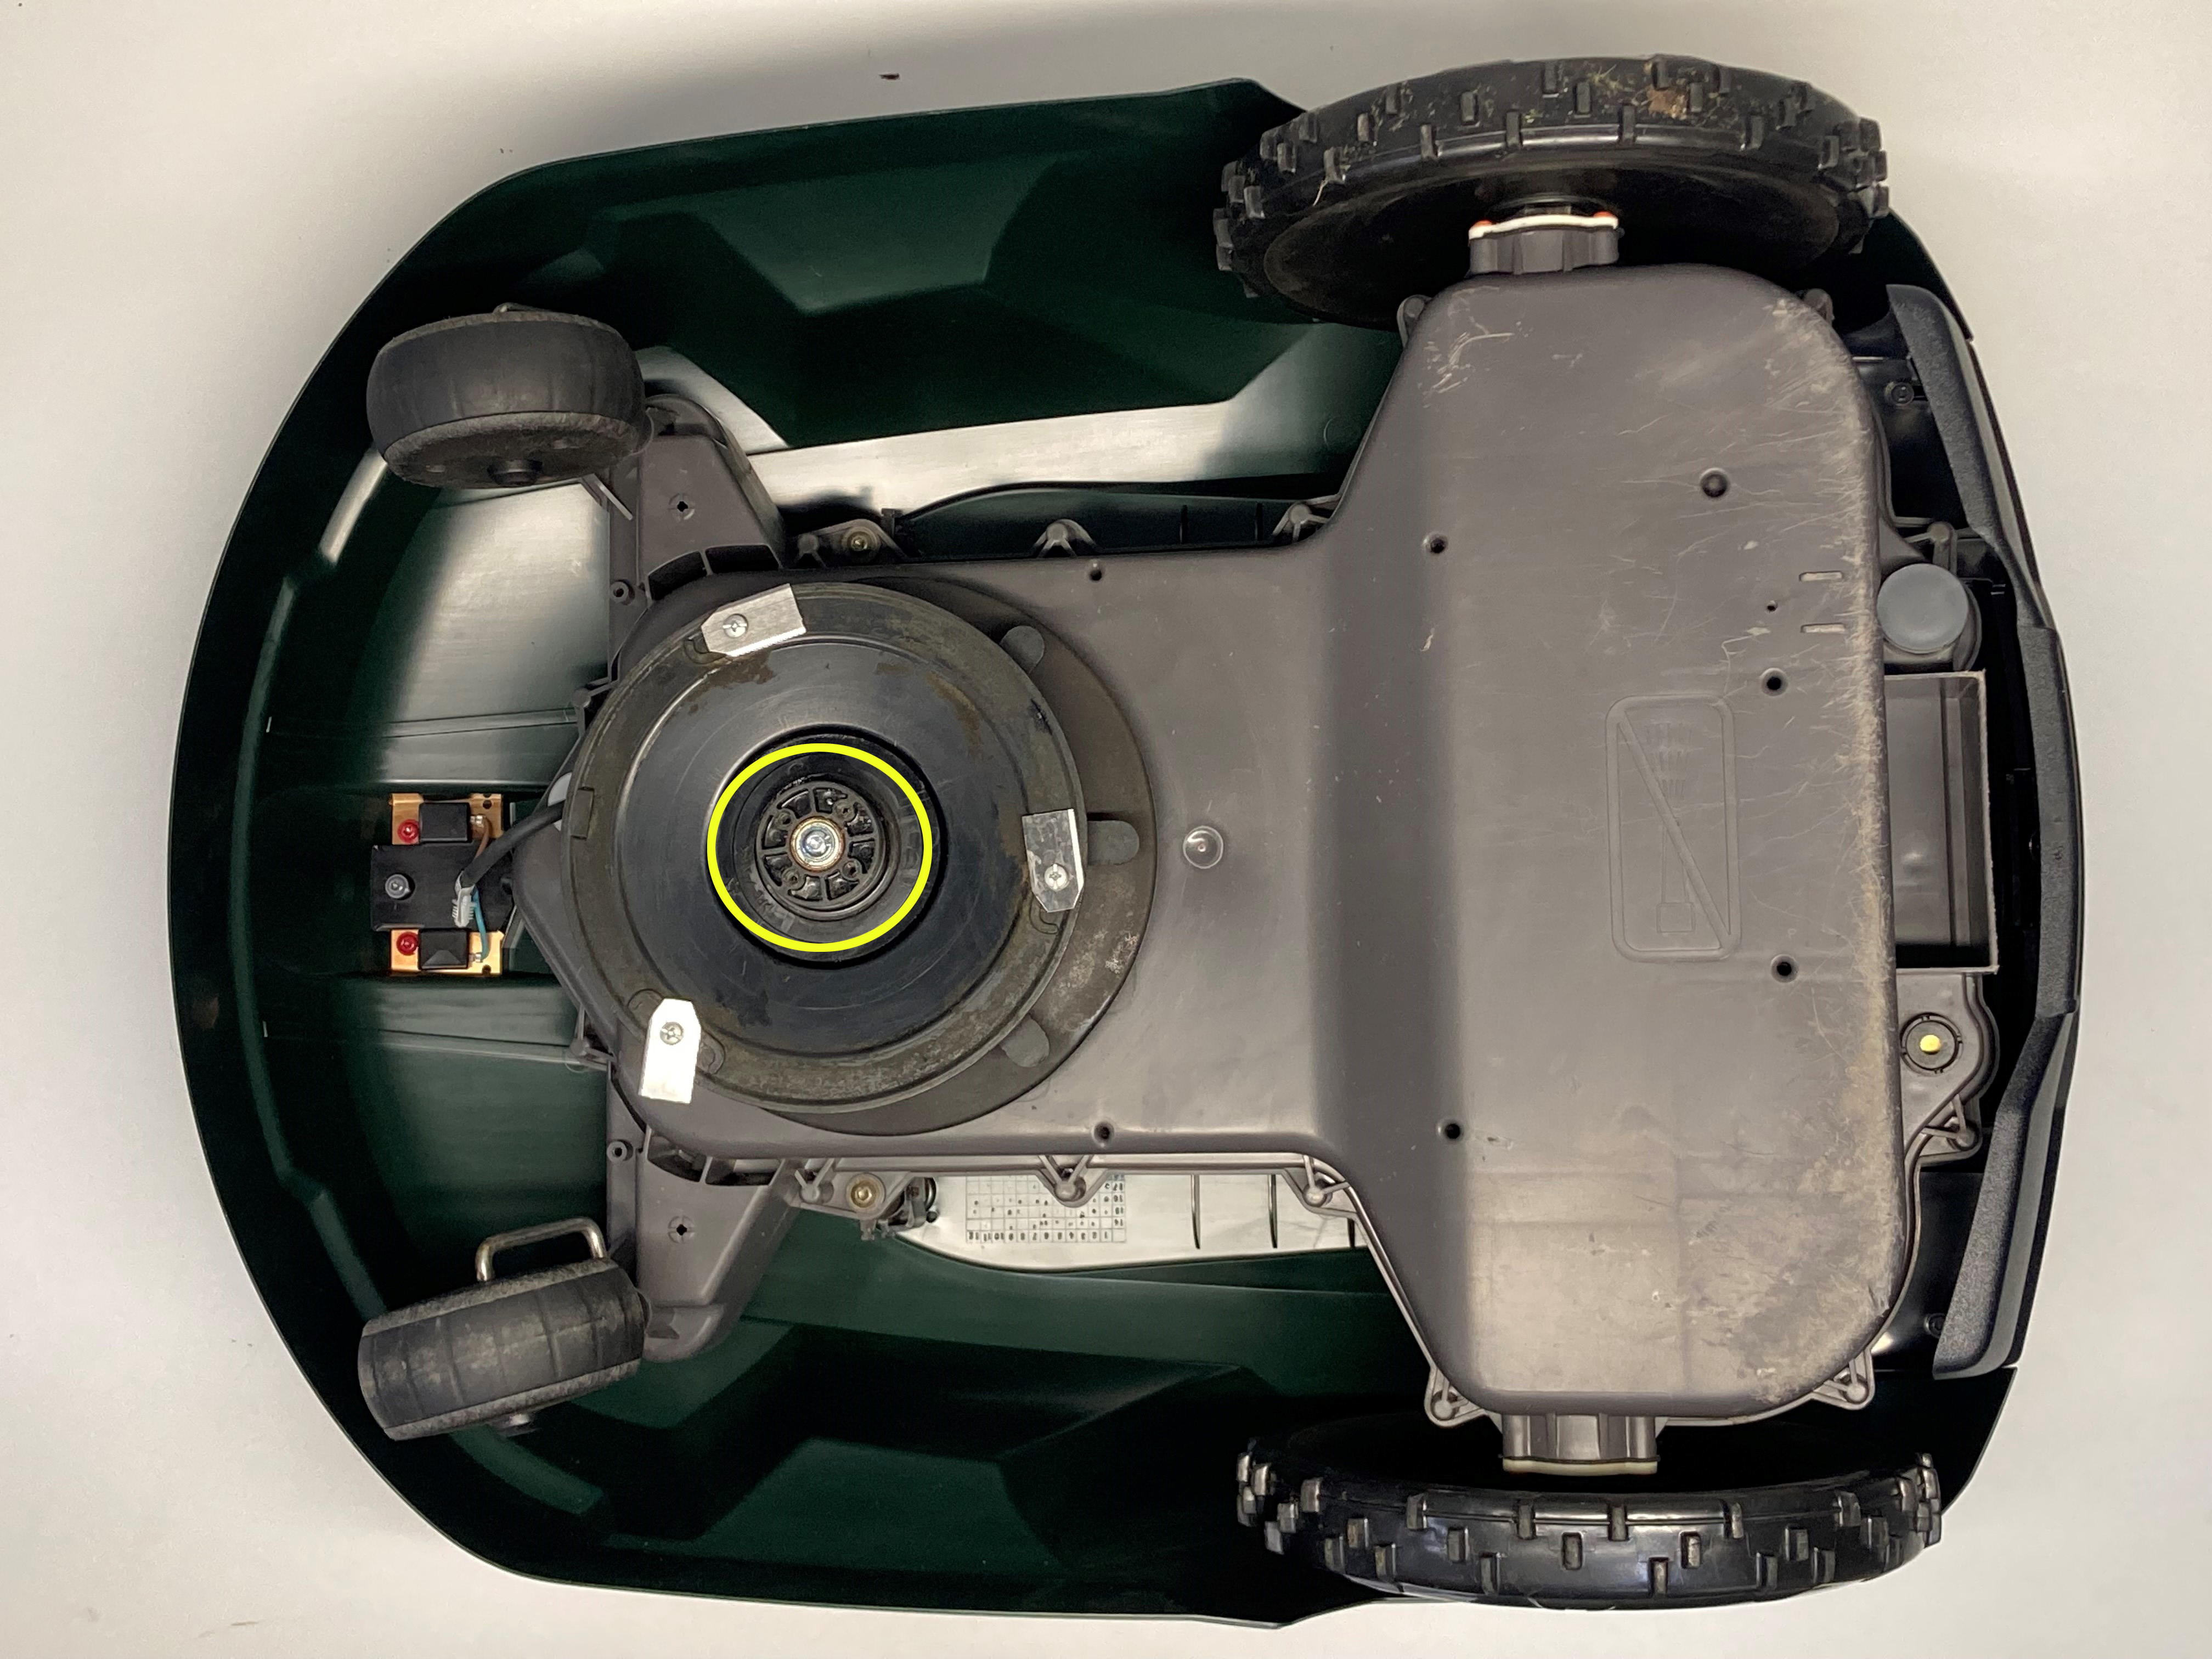 Step 2: Lift off the skid plate and the cover. Loosen the centre screw that secures the bearing retainer. Use a size 4 allen key and hold the blade while loosening the screw. This screw can be tight and you may have to use a lot of force. This screw usually has a right-hand thread. Step 2: Lift off the skid plate and the cover. Loosen the centre screw that secures the bearing retainer. Use a size 4 allen key and hold the blade while loosening the screw. This screw can be tight and you may have to use a lot of force. This screw usually has a right-hand thread. |
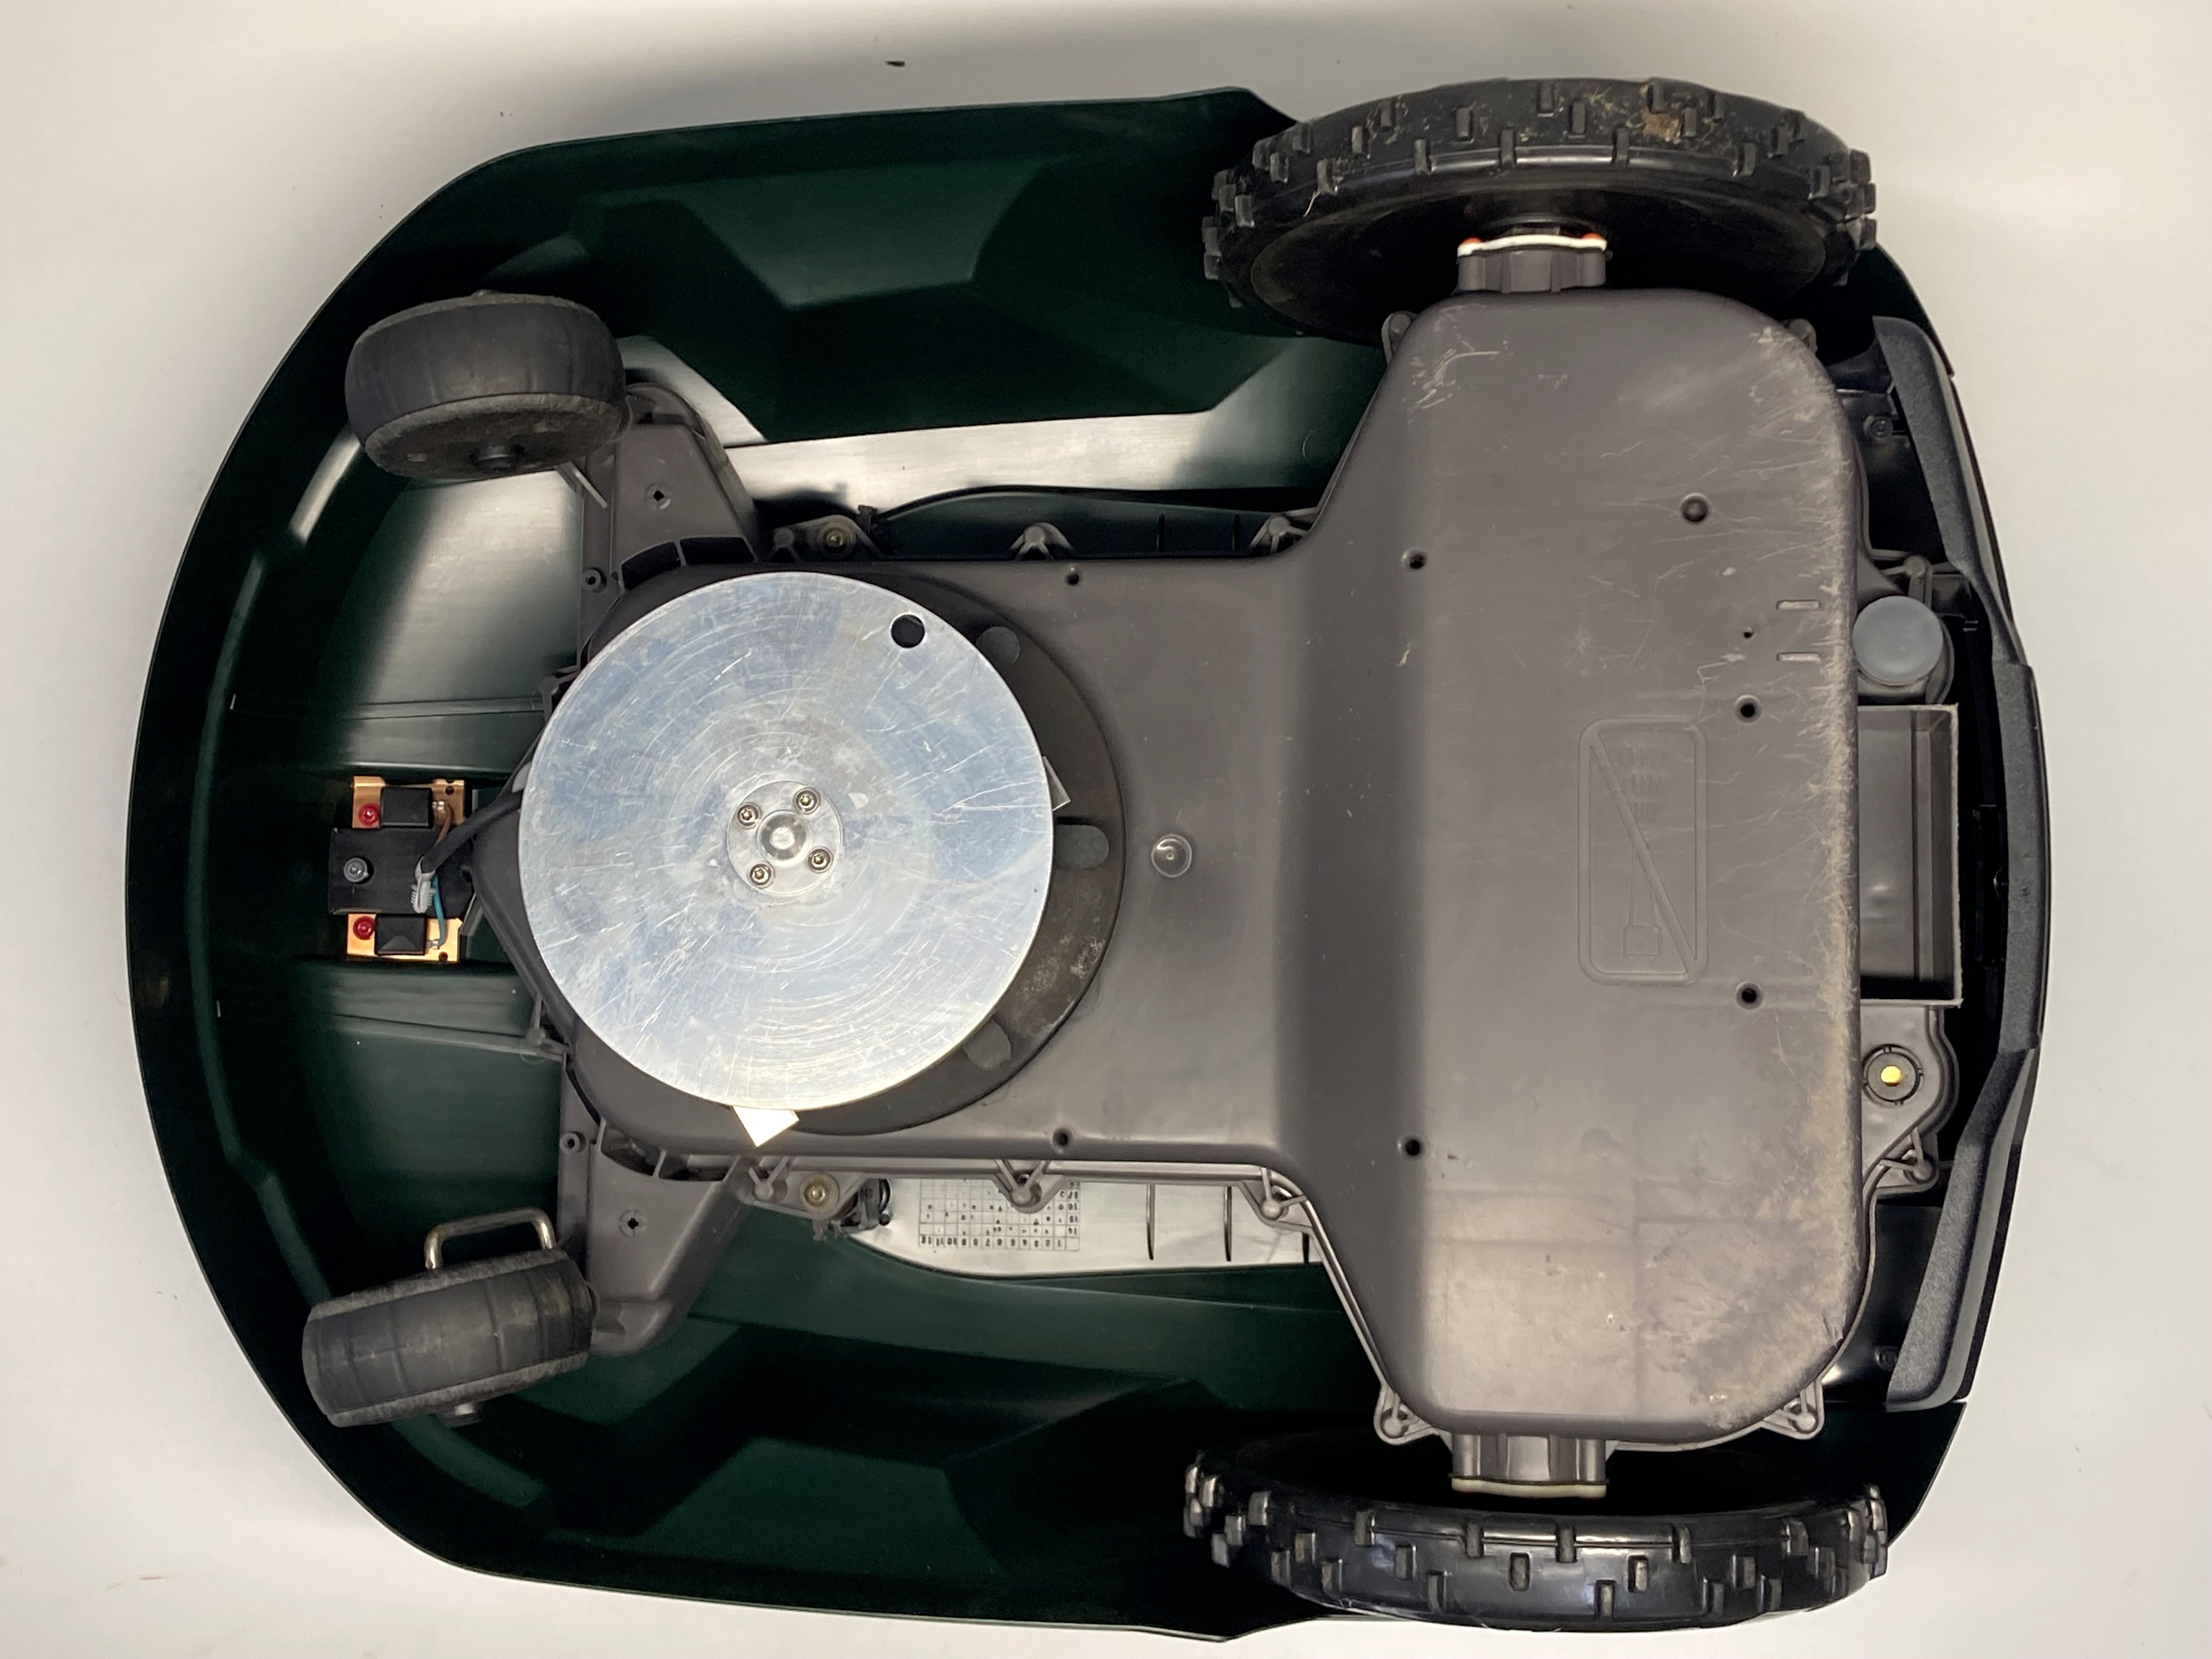
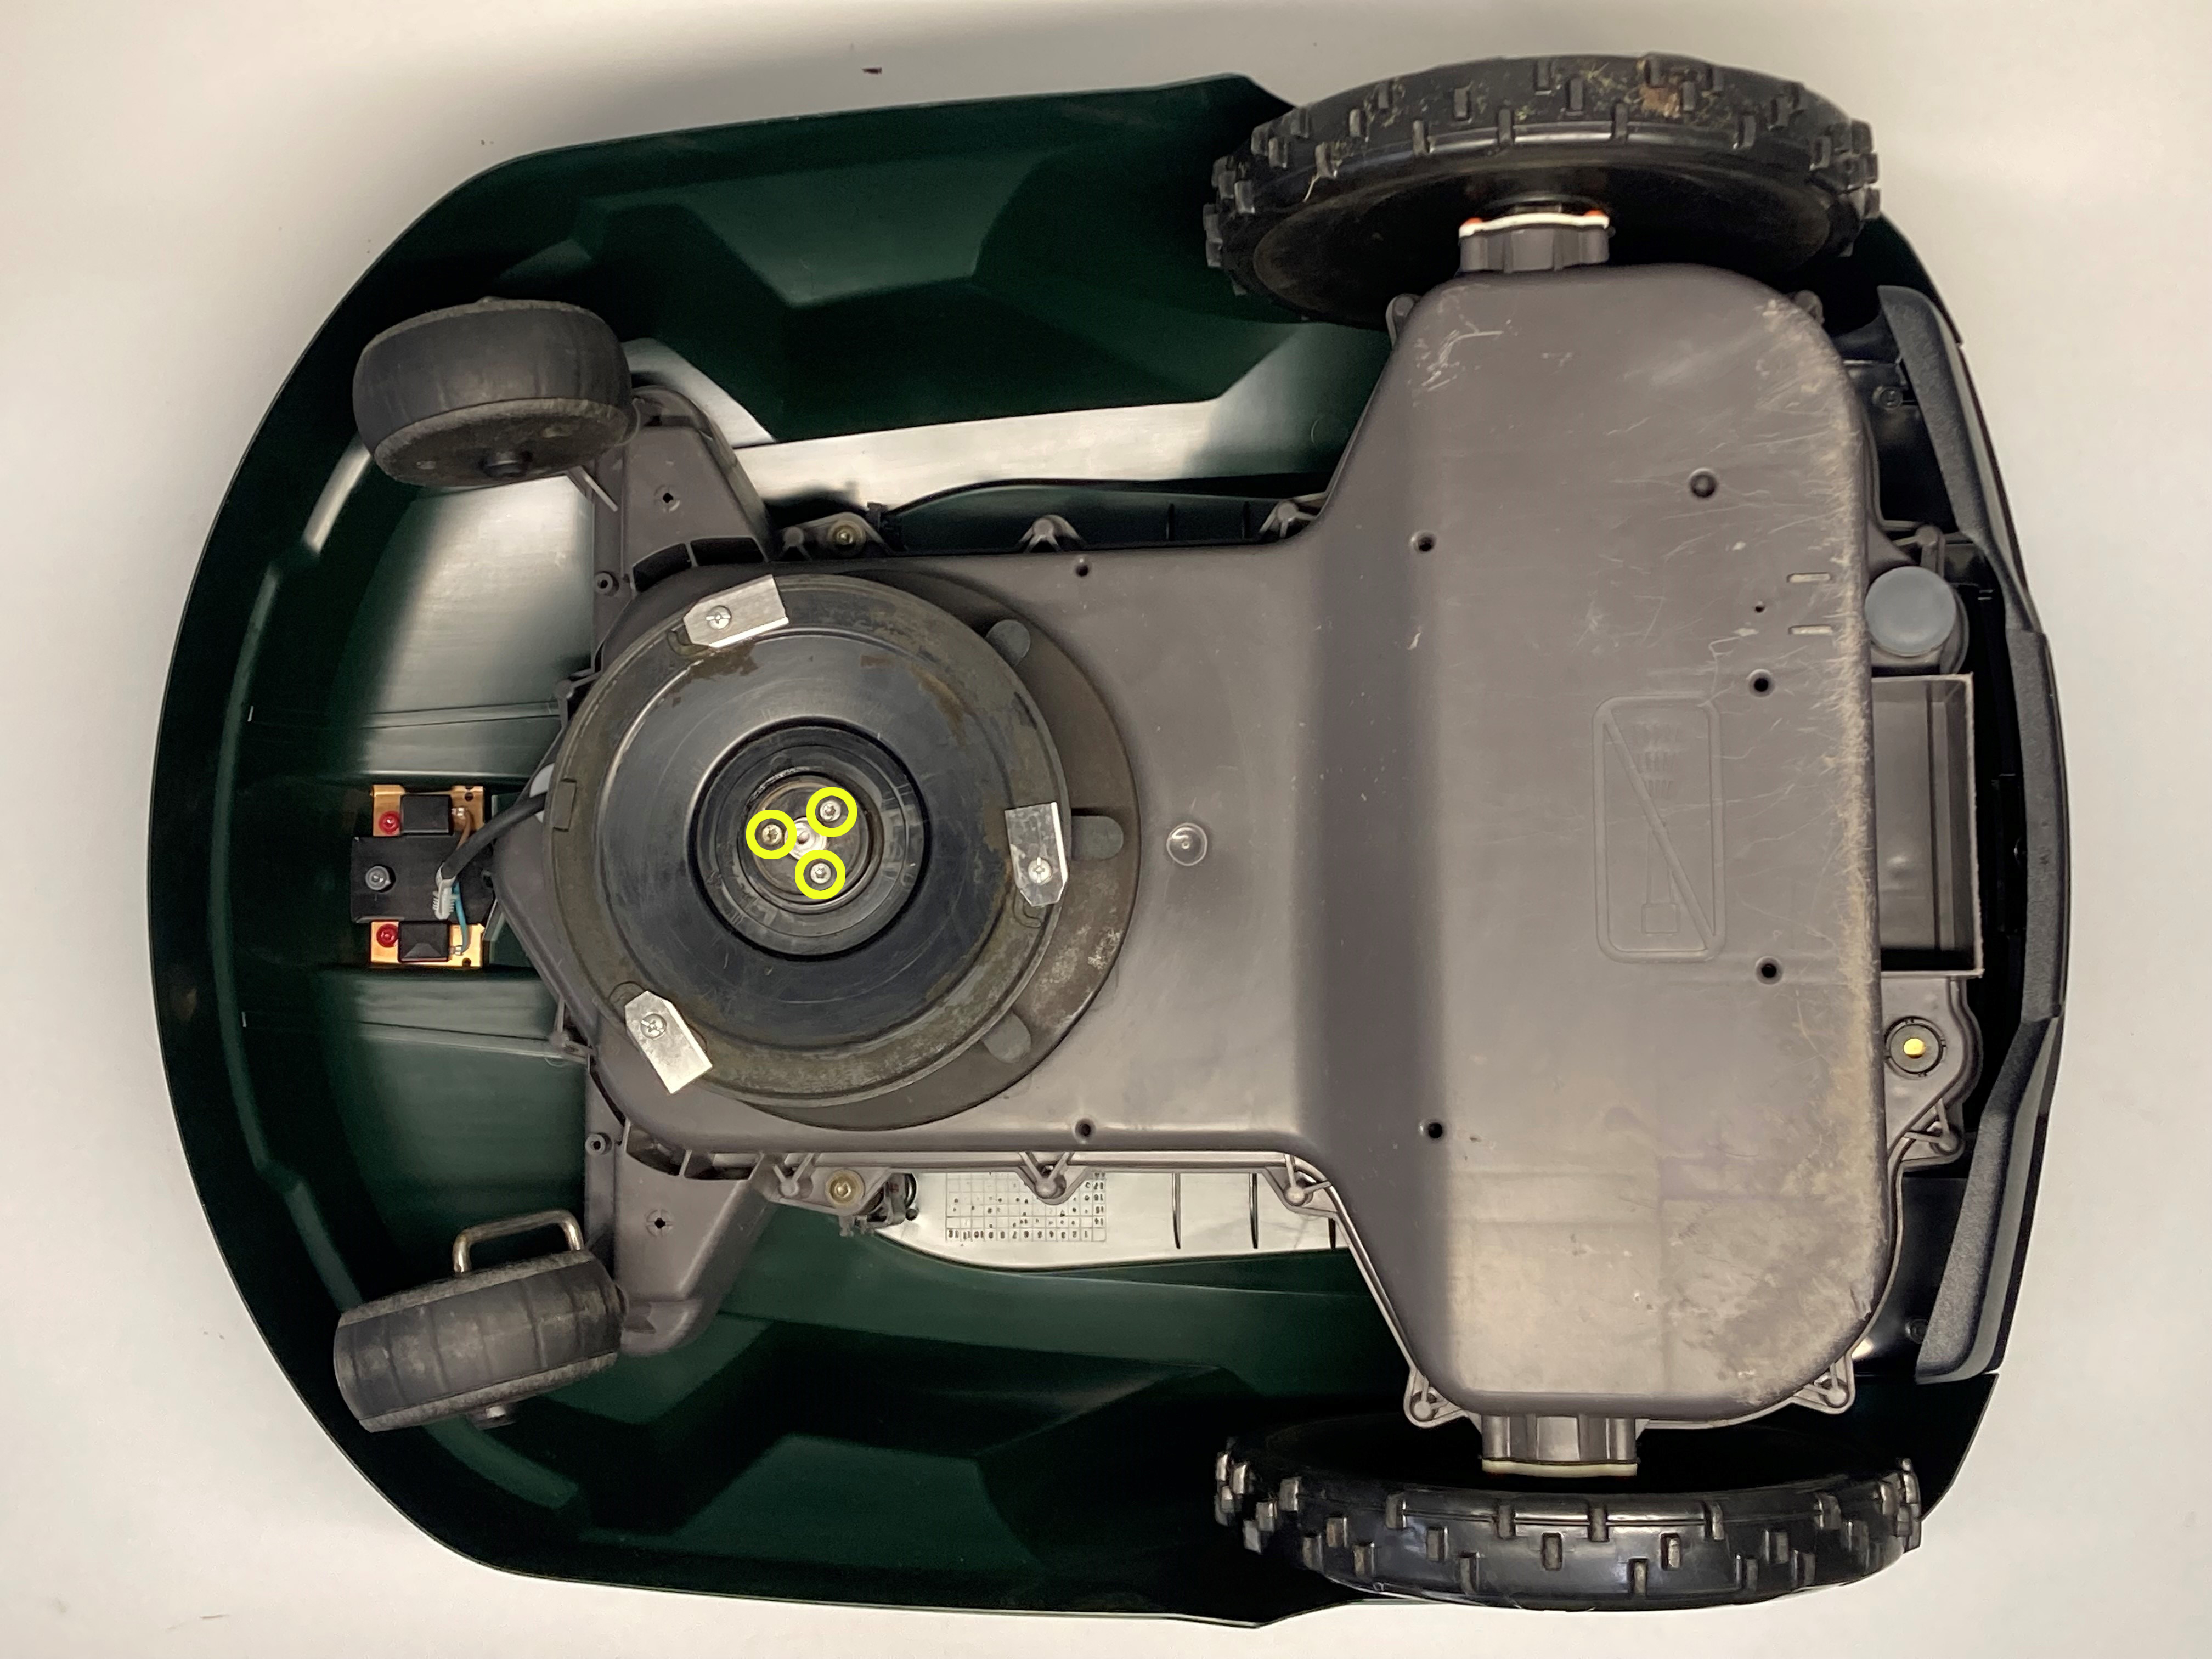 Step 3: When you've removed the centre screw, you can lift up the bearing holder. Then unscrew the three torx screws that hold the blade disc in place. | 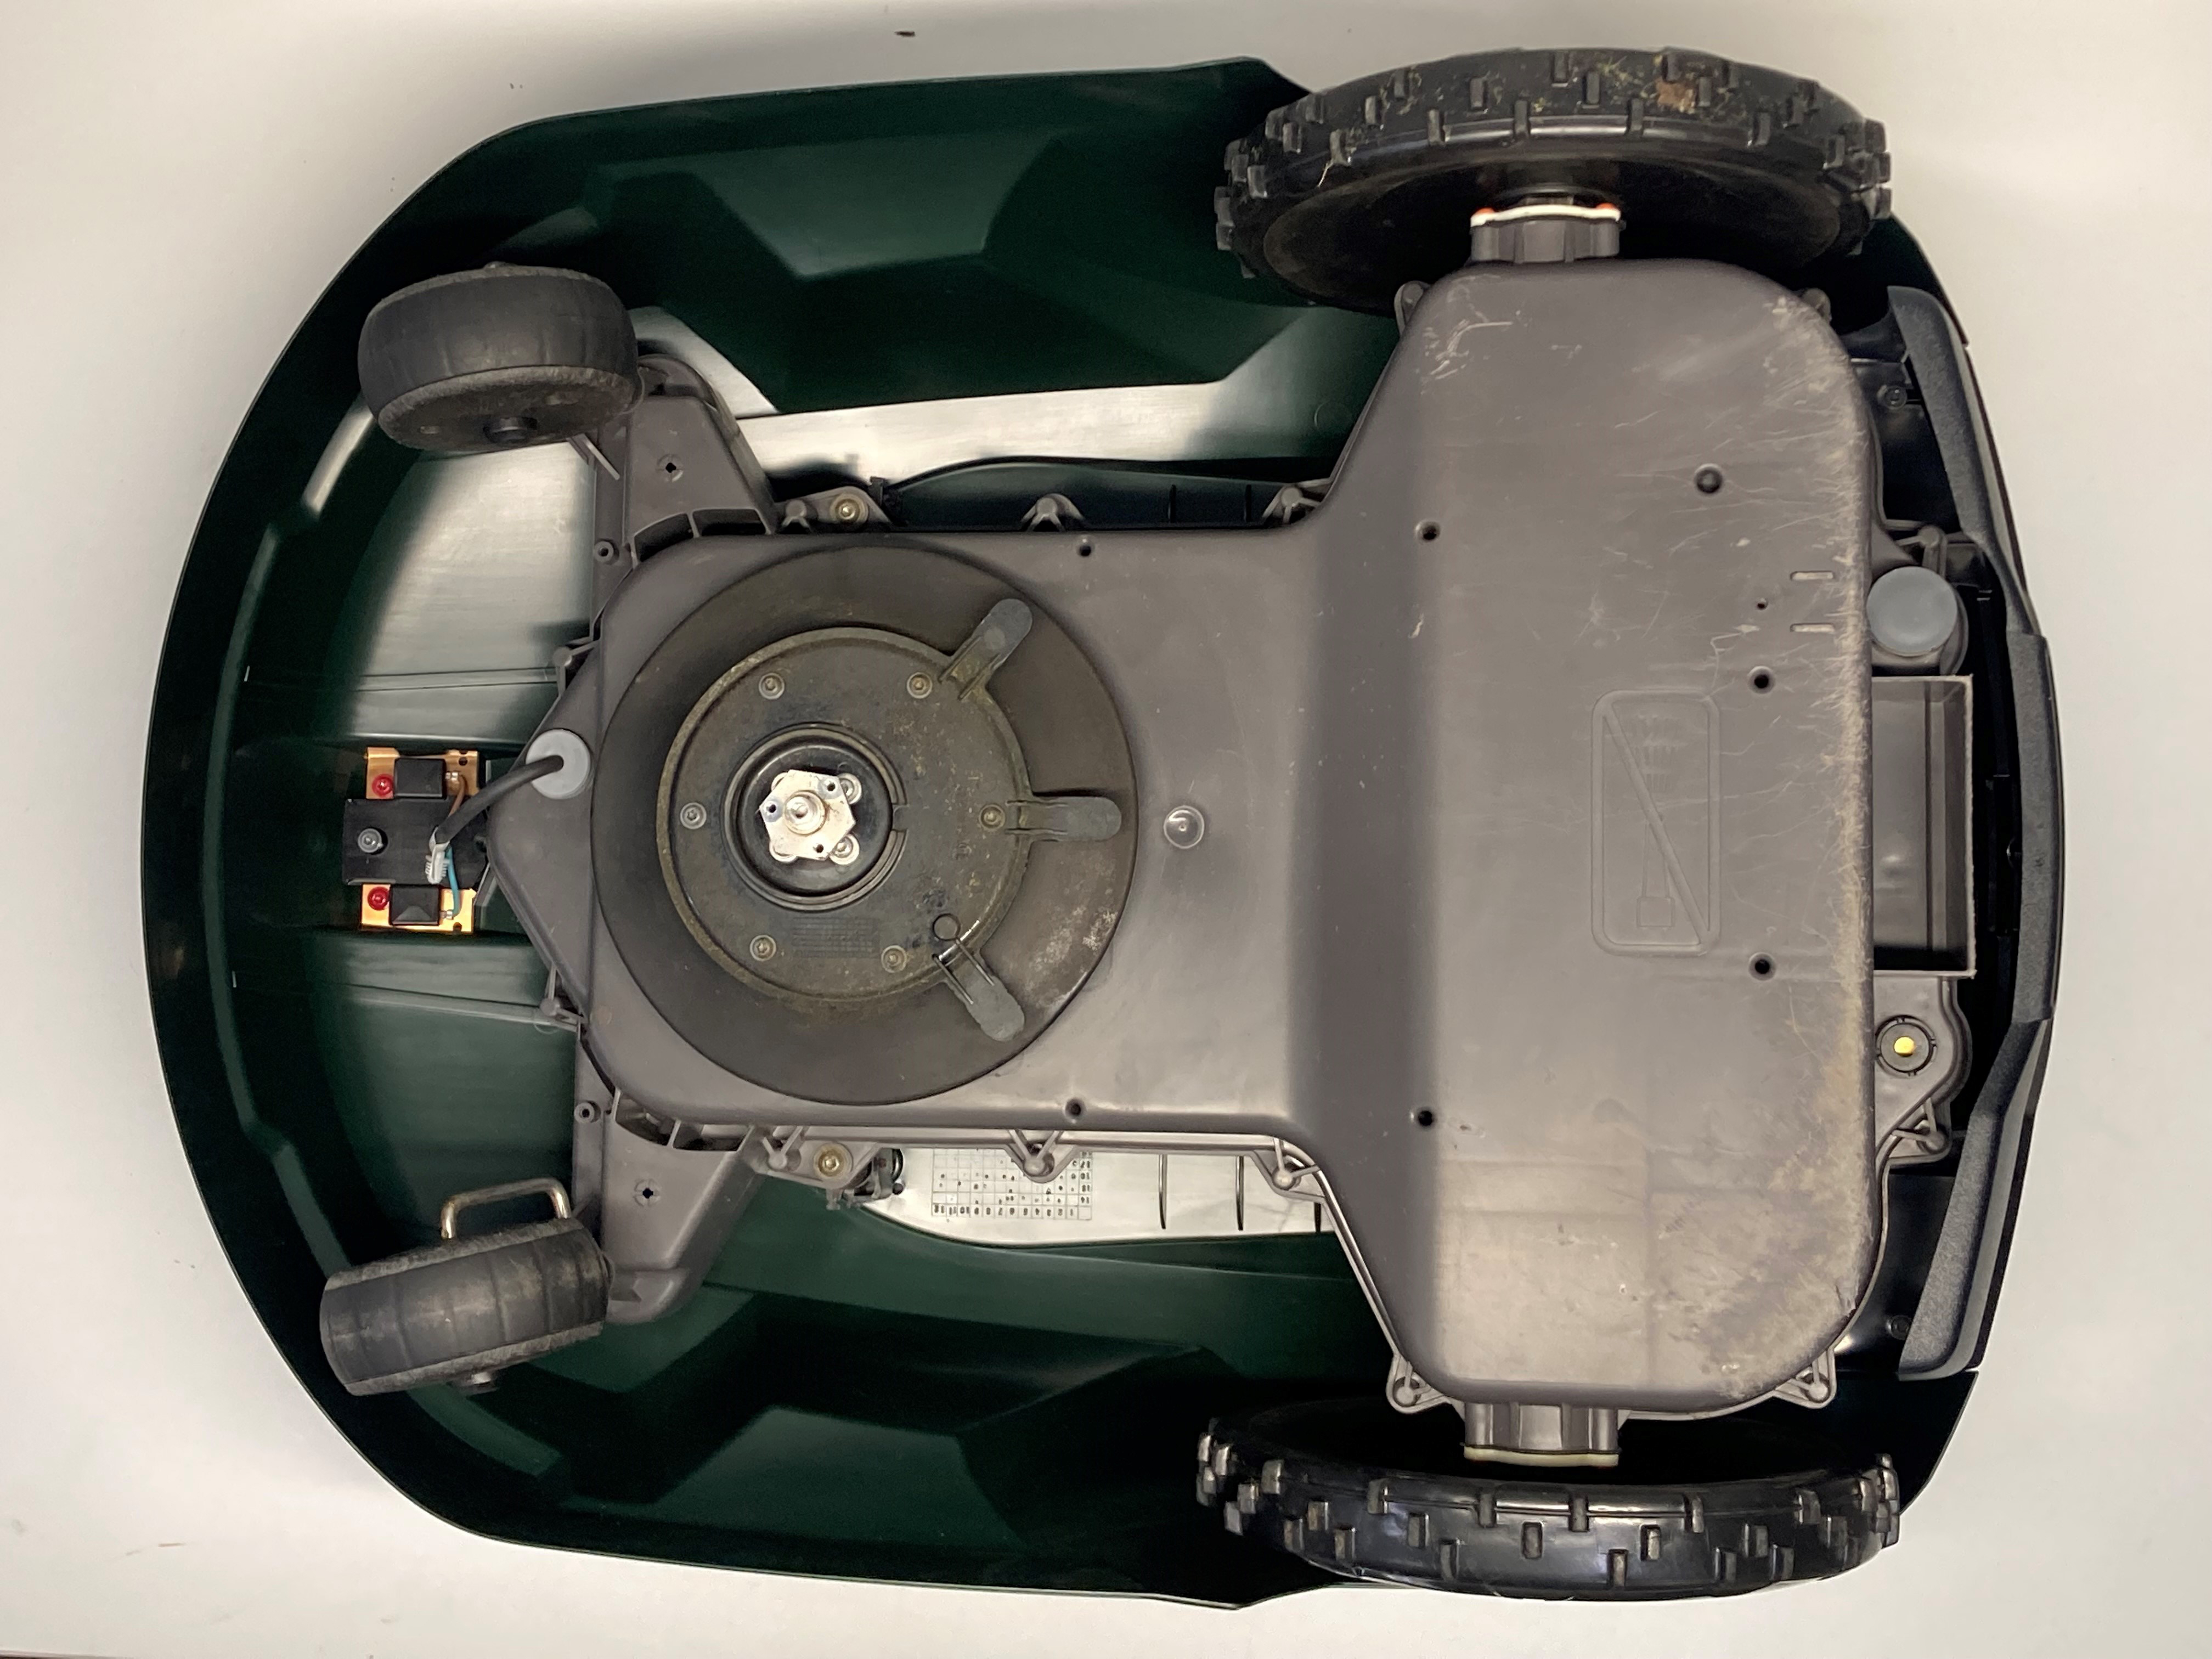 Step 4: Lift off the blade disc. |
 Step 5: Insert the new blade disc (assemble the new blades on it first). Screw in the three screws. | 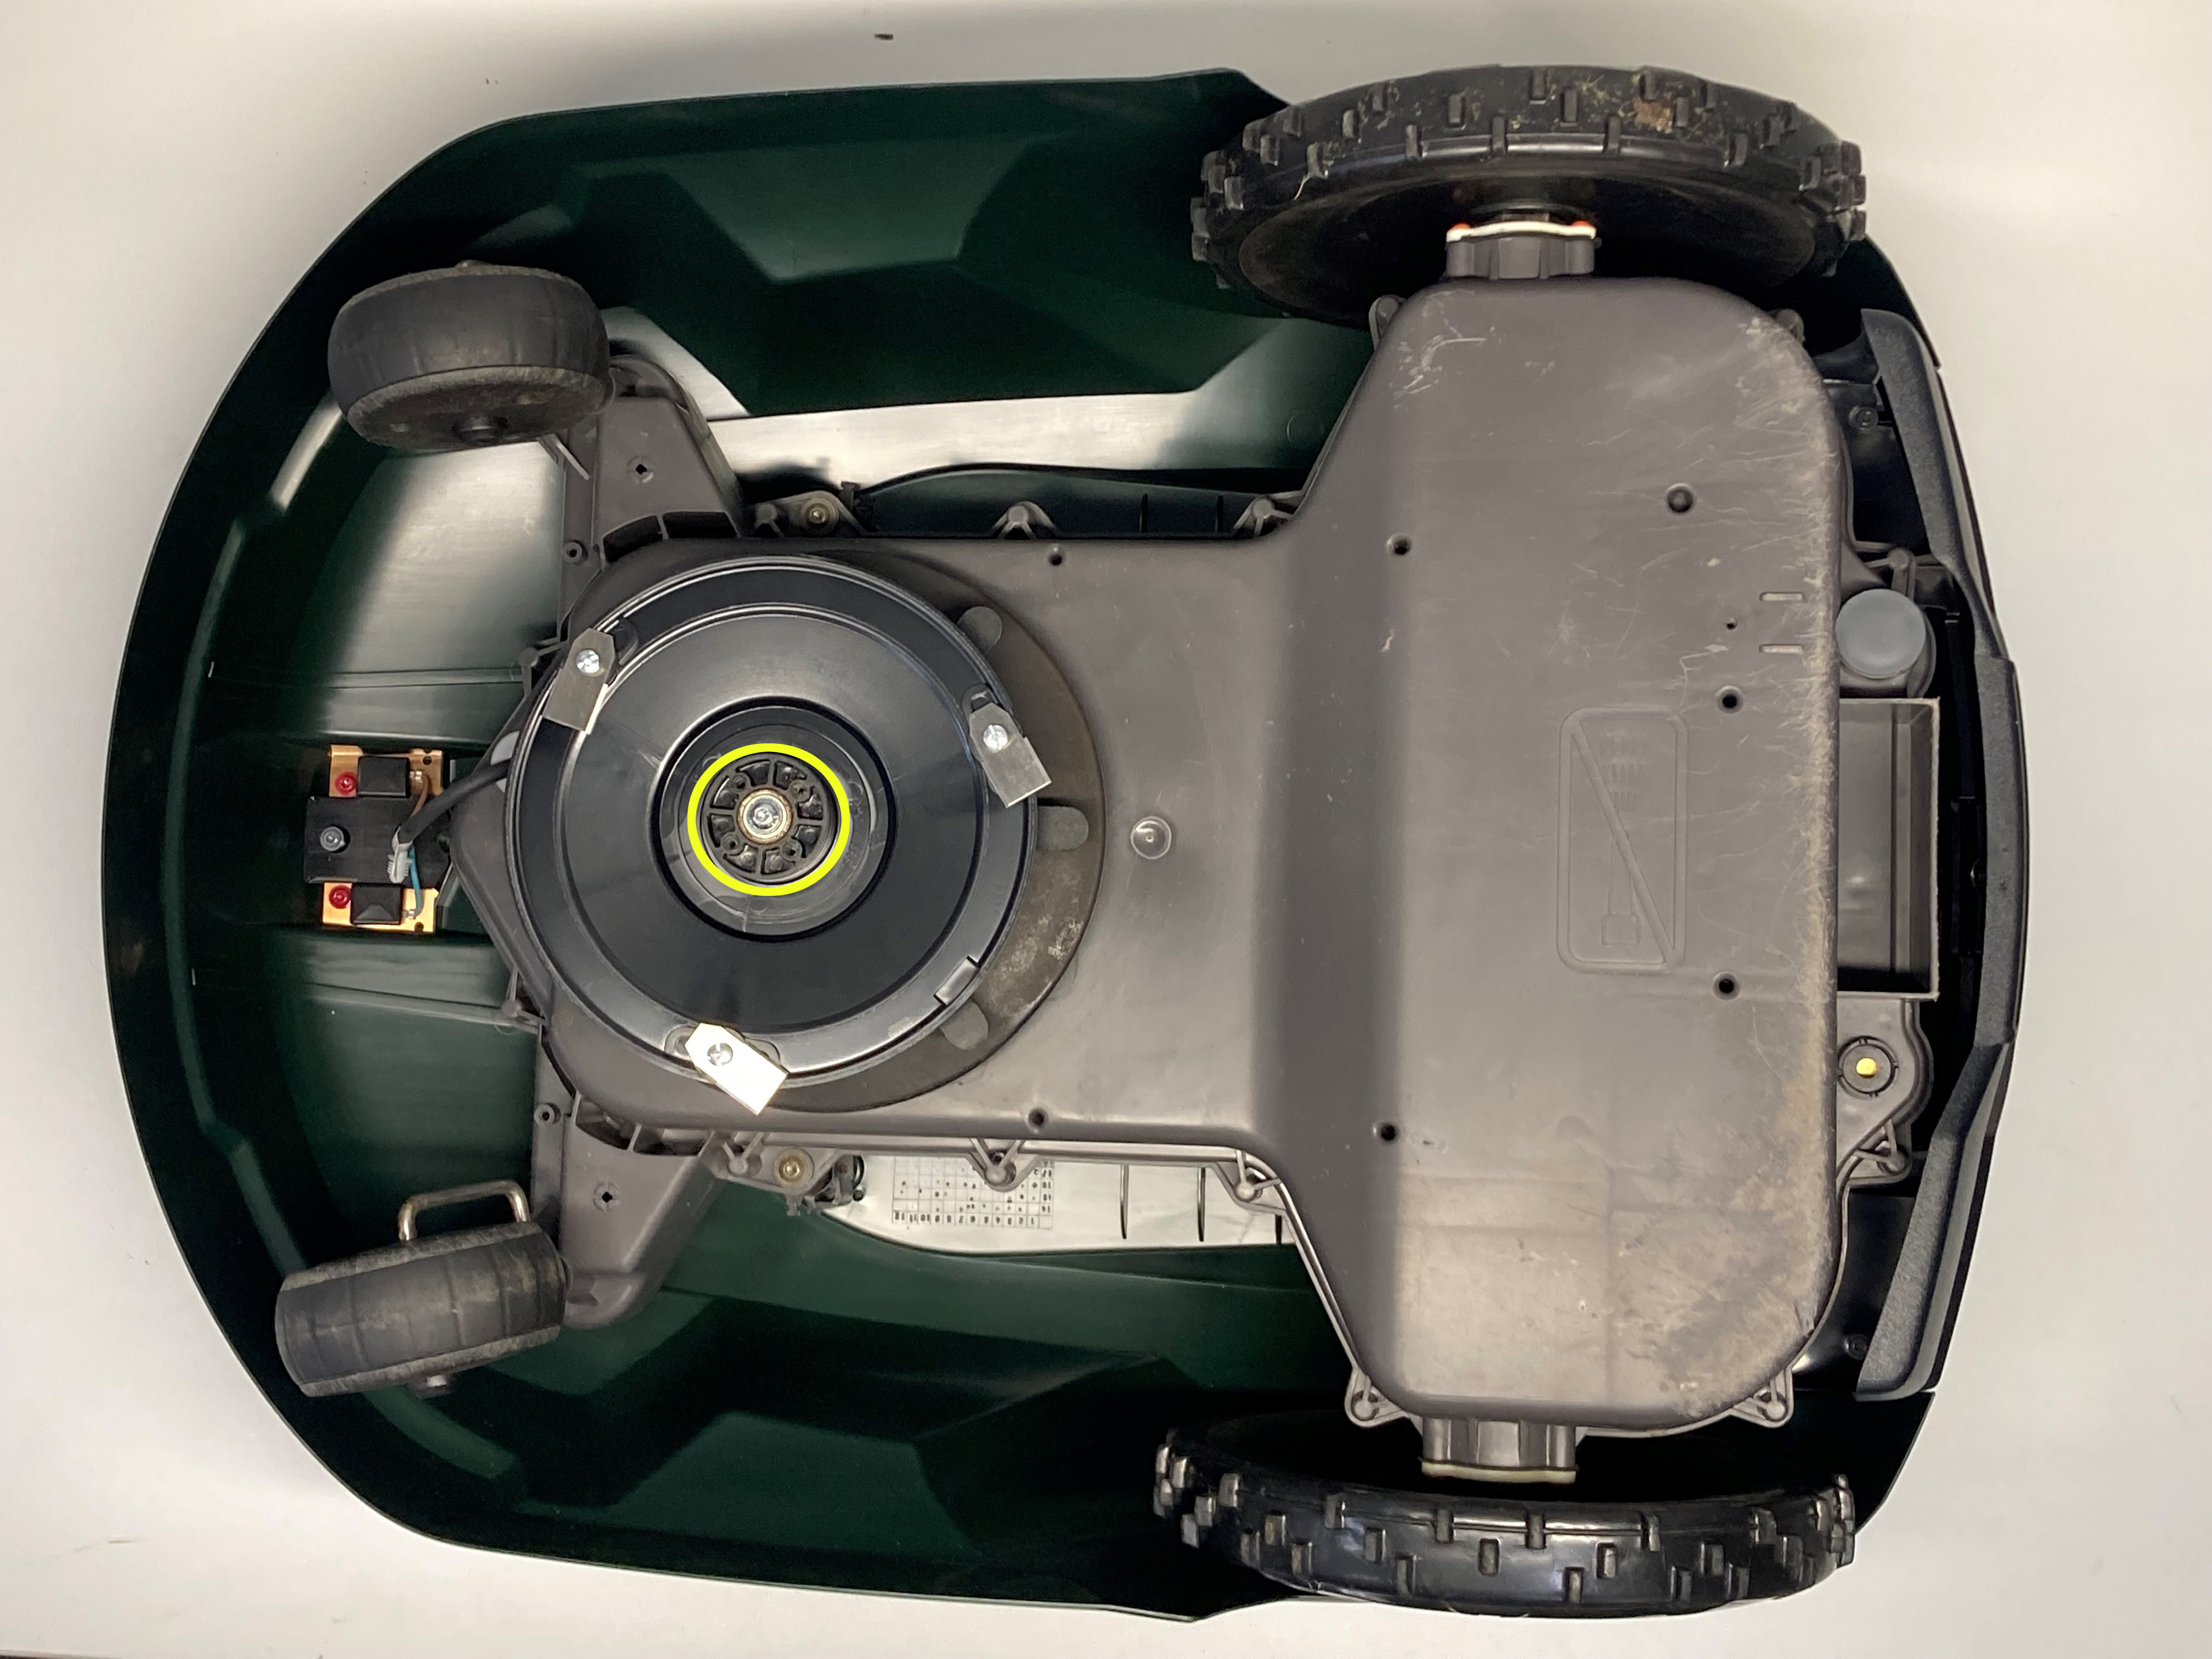 Step 6: Replace and tighten the centre screw holding the bearing holder. |
 Step 7: Put the engine protetor plate and the lid back on and screw in the four screws that secure the cover and skid plate. |
Make sure all the parts can rotate freely after you have finished. Then just use your Automower as usual.
Change the blade disc on Automower 220AC and 230ACX
Here is a step by step guide of how to disassemble and replace the blade disc on the Husqvarna Automower 220AC and 230ACX. The same principle applies for both 260ACX and 265ACX.
A cracked or damaged blade disc causes an imbalance in the cutting system that can result in missing blades or noise from the robotic lawnmower.
Changing the blade disc is a simple process and doesn't require any special tools. See below for step by step instructions.
At the bottom of the page there is a list of the spare parts needed for the job.
Tools we use: Torx screwdriver T20, Allen key size 4.
| Step 1: Turn your Automower over. Unscrew the four marked screws that keep the engine protector pkate in place. |
| Step 2: Lift off the skid plate and the cover. Loosen the centre screw that secures the bearing retainer. Use a size 4 allen key and hold the blade while loosening the screw. This screw can be tight and you may have to use a lot of force. This screw usually has a right-hand thread. |
Step 3: When you've removed the centre screw, you can lift up the bearing holder. Then unscrew the three torx screws that hold the blade disc in place. |
Step 4: Lift off the blade disc. |
Step 5: Insert the new blade disc (assemble the new blades on it first). Screw in the three screws. |
Step 6: Replace and tighten the centre screw holding the bearing holder. |
Step 7: Put the engine protetor plate and the lid back on and screw in the four screws that secure the cover and skid plate. |
Make sure all the parts can rotate freely after you have finished. Then just use your Automower as usual.
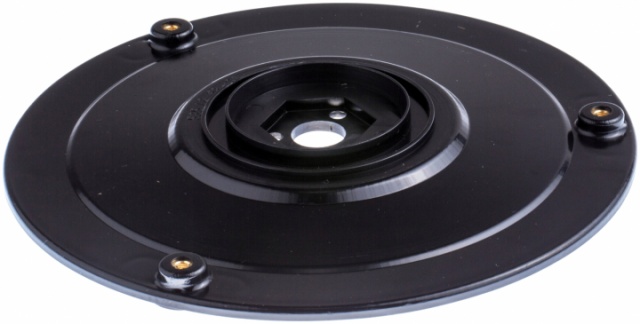
Spare parts used
 Help center is a digital DIY manual for Husqvarna Automower robotic lawnmower. We teach you how to change batteries, circuitboards and other spare parts on your Husqvarna Automower.